Showing posts with label tree. Show all posts

Thursday, 10 November 2016

Crafty Mommy Workshop - Autumn

After a lot of thinking and preparation I managed to hold my very first Crafty Mommy Workshop with Autumn crafts and activities.


Quite a few moms have asked me about the activities we've been doing with E. since she was small, so I thought it would be a good idea to have a craft session for mommies (instead of telling everyone separately).

The workshop was in Hungarian as English-speaking moms didn't sign up 😞. The main idea was that moms could learn some easy to make activities and at home they can work them out with their kids.

I collected autumn activities around 5 major topics:

  • Conkers
  • Leaves and trees
  • Halloween
  • St. Martin's Day (Márton nap)
  • Thanksgiving
I dedicated 1 hour to go through the activities, however, they proved to be too many as we couldn't cover the last 2 topics. Still, I hope the 2 moms who turned up (other 2 cancelled 😞) will benefit from what they heard at the workshop. 

The original ideas of these activities are either from other blogger moms or mine. I mainly came up with  the conker games but here I'd also like to pay tribute to the pages I read and "steal" ideas from:

Leaves and tree activities:
  1. Paint and stamp with the leaves


  2. Paint around the leaf


  3. Laminated leaf rubbing (or just place leaves under a white sheet of paper and rub it with autumn colour crayons)


  4. Leaf lacing
    Although I didn't print the free printable leaves, just used our laminated leave that I'd punched on the sides. Shoelaces are pretty goof for threading, but if your child has any difficulties with the small ending you can add some cell tape to make the end firmer.


  5. Make leaf faces and  people out of (laminated) leaves

  6. Leaf shred pictures autumn images and animals too
  7. Count the leaves with free printable
  8. Stamping leaves on a tree with toilet paper roll
  9. Popsicle stick tree 
  10. Make a hedgehog/squirrel with leaves

What else to do with leaves:
  • collect them
  • group them by their size, colour
  • make them stand in a line from the biggest to the smallest
  • paint them, colour them, trace them
  • press them
  • make a crown out of fresh autumn leaves

The participants got a nice pack of goodies to work with at home, like 10 laminated leaves, a punched leaf with a shoelace for the lacing, some magnets so they can stick the leaf faces/people on the fridge, popsicle sticks, squirrel/hedgehog templates and the counting leaves free printable.

The third topic we could cover was Halloween. Here are the crafts I showed to the moms:

  1. Cotton ball ghost
  2. Baby food jar mummies (I'll soon write a post on this in detail)

  3. Jack-o-lantern faces with shapes
  4. Pumpkin emotions
  5. Toilet paper spiders, monsters with googly eyes 
  6. Skeleton out of cotton buds

In the mommy package there were some toilet paper tubes, googly eyes, black pipe cleaners, cotton balls, baby food jar, a roll of gauze, black cardboard, orange construction paper and, of course, two printables: the black shapes for making Jack-o-lantern faces and the pumpkin faces showing different emotions.

The other topics were postponed and due to the lack of time we agreed to have a similar session with winter and Christmas activities. We had a wonderful time together and I've been planning our next session excitedly.

Tuesday, 11 October 2016

Treetop painting with corks

After playing outside and observing the autumn leaves I've prepared an easy, colourful painting activity for E.


While doing it with our Canadian nanny, V., we were revising the autumn colours and talked about why leaves change colours in the autumn.

So after snack time when our nanny, V. arrived they sat down together to start painting.
(I didn't prepare much for this activity. I just put out the paint - orange, yellow, red, and brown -. a palette and two sheets of paper with a bare tree drawn on them. I forgot to take a "before" photo. 😒)


The painting could start. E. squirted the paints on the palette, which is a great activity to strengthen the muscles in her hands).


Each colour had its own cork.

They made dots on the branches.


Autumn leaves are falling down.


Using both sides of the cork is rather messy...


End results...


Can you guess which one is E.'s  painting? Just after having finished, E. said something about the wind and tons of leaves and was smudging brown paint all over her tree top. Well... no comment 😜


Treetop painting with corks

After playing outside and observing the autumn leaves I've prepared an easy, colourful painting activity for E.


While doing it with our Canadian nanny, V., we were revising the autumn colours and talked about why leaves change colours in the autumn.

So after snack time when our nanny, V. arrived they sat down together to start painting.
(I didn't prepare much for this activity. I just put out the paint - orange, yellow, red, and brown -. a palette and two sheets of paper with a bare tree drawn on them. I forgot to take a "before" photo. 😒)


The painting could start. E. squirted the paints on the palette, which is a great activity to strengthen the muscles in her hands).


Each colour had its own cork.

They made dots on the branches.


Autumn leaves are falling down.


Using both sides of the cork is rather messy...


End results...


Can you guess which one is E.'s  painting? Just after having finished, E. said something about the wind and tons of leaves and was smudging brown paint all over her tree top. Well... no comment 😜


Friday, 7 October 2016

Popsicle tree

Since autumn arrived we have been collecting leaves, talking about why leaves change colours and why they fall down. We've been hugging trees, examining their bark, trying to climb up on them, just to mention a few tree related activities. Outside.


When the weather got really rainy I thought I would bring the tree activities inside. That was when I introduced the popsicle tree activity to E.

What you need:

  • 20-30-40 popsicle sticks (wooden spatulas can be bought at the chemists for 500 HUF - less than 2 euros - but in hobby stores they can be found too)
  • collected leaves (or felt leaves)
  • conkers, acorns or any other nuts
  • felt animals like hedgehog, any kind of bird, squirrel etc.
How we played:

I gave E. the bag which I collected all the goodies in and I showed her how to build a tree. I just started and she took the lead.

While doing it we were talking about the different parts of the tree (tree top, branches, leaves, trunk, bark, roots). Also we mentioned what we can see in the tree top in different seasons. (green leaves in the spring, fruits in the summer, bare branches and yellow leaves in the autumn, nothing in the winter).

She placed the leaves very accurately.


Then some conkers and a squirrel...


After a while I couldn't hold Baby Sis back and she came to "destroy" E.'s tree. There was some screaming and "don't touch it" but not much playing together. E. gave L. a conker to play with but I had take it away from L. as it was too small (and I wanted to avoid ER at all cost) E. tried to give Baby Sis a laminated leaf but she wasn't interested. Baby Sis wanted the popsicle sticks, which meant the end of the tree.


"Noooooooo"
After a while E. gave up  (got a little offended) and turned away from us to build a house instead out of the popsicle sticks.


 E. was so uninterested at the end that only Baby Sis helped me pack away. At least we practised "put it in" with her.


As you can see life and activities with 2 kids are quite a challenge. I keep trying but success is still far away... 

Anyways, I'm thinking of adding some brown yarn or thin ribbons to create the roots. We'll try again next year when Baby Sis might not want to "destroy" but rather want to bulid.

Thursday, 27 November 2014

Happy Thanksgiving! - Tree of gratitude

This year has been wonderful, there are a lot of things that we can be grateful for. I wished E. would feel the gratitude for all the amazing things in our lives.


Tree of Thanks - a great idea for Thanksgiving came from Jen, a blogger mum whose posts I've been reading on a daily basis nowadays.

The main idea is an autumn tree with brownish, yellowish, and orange leaves. We write down a few things that we are thankful for on the leaves and stick them on the tree of gratitude.

We didn't have much time to do this activity (I needed to prepare for Daddy's birthday, too), so it is not as elaborate as in the original idea.

What you need:

  • colour paper (red, brown, orange, green - or you can paint as Jen suggests)
  • scissors
  • a bigger sheet of sticky paper (contact paper or sticky book jacket)
  • markers
I quickly cut red, brown, yellow and green leaves out of colour paper and drew a tree on the sticky paper (on the non-sticky side). The latter I sellotaped (sticky side out) on the balcony window. (Unfortunately you can't see much on the photos as it got dark, but tomorrow I'll add a picture taken in daylight)

naming the different colours and counting how many leaves she has

When we arrived home, E. sat down and I told her that we should collect people and things we love and we feel thankful for. (Much to my surprise she understood and immediately said : - Daddy!) I came next: - I love Mommy so much. :D

First, we tried to write the words together, but when she added snowman and chicken thigh I wrote them on the leaves myself.


When we'd finish with our collection (cheese, Grandmas, Santa, doggy, antibody hat, i.e. her thermo-hat against ear problems) we moved to the balcony door and E. stuck up the leaves on the tree.
She was really proud of herself and also, gave a kiss to Santa :) (then to me)

collecting

sticking

-------- Update: 03/12/2014---------

Here is a photo taken of our Tree of Gratitude in daylight... well, you can see a little (!!!) more.


Unfortunately we didn't have time for the Turkey of Thanks wreath. Well, we need something for next year, too.

Happy Thanksgiving!

If you want some cute and funny Thanksgiving songs, here is a small collection:


Tuesday, 18 November 2014

Crafts for Thanksgiving - Chapter 1.


I'm not sure if E. understands the concept of being thankful, though one night when we talked to the Angels I wanted to say good night and she said:

- Wait, Mommy!
- Yes?
- I want to say thank you.
- What for?
- For the skeleton costume.

So I might be wrong. She can also say thank you whenever I give her some food or a toy. Sometimes she reminds Daddy to say thank you.

I told her the Thanksgiving story very basically though we focused more on being creative this time.

Colour your turkey - letter recognition

I mentioned to E. that American people celebrate Thanksgiving with turkeys, like we celebrate Martin-day with geese.

So we coloured a turkey. I printed an image of a turkey from the net, but before we started I added some letters to different parts of the turkey. With some of the dot markers I signed orange, yellow, red and purple next to the turkey. She immediately understood how to colour it. We have no brown dot markers so we used a crayon.

identifying the letters


staring with yellow


our colourful turkey


Bubble wrap paint turkey

I found this idea on craftymorning.com . I'm not going into details as you find easy-to-follow instructions on the site.


It looked great, so we tried it. It's a little too complicated with a 2 and a half year old. You need to wait a lot for the paint to dry. E. had no patience. But she enjoyed the painting. I had no dark brown coloured paper so we painted the body too. (The thermo-hat is due to an ear infection)

painting the body


adding the eyes on the stool - where else?


finished with the beak too, though there's no snood
I cut the feathers - she did the sticking


Turkey without legs and snood


Autumn tree variations

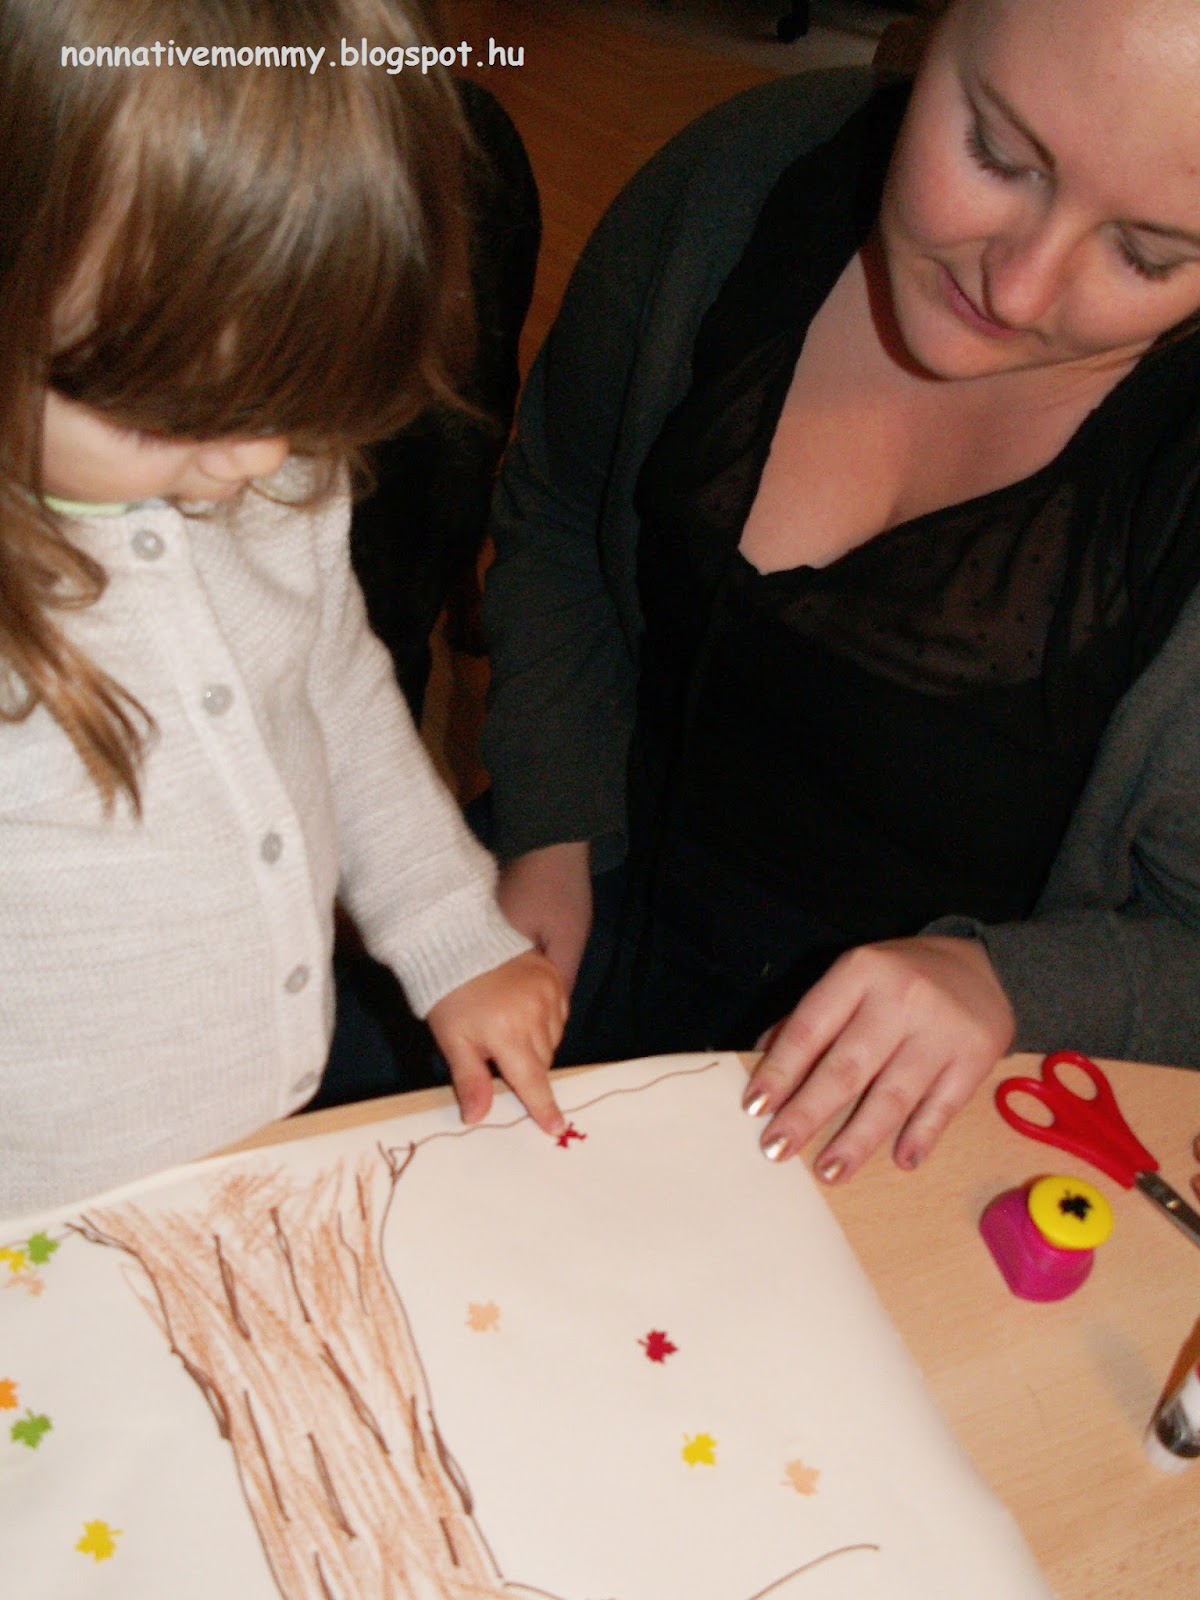
The first tree idea came when E. enjoyed looking at me punching leaf shapes with this.


So while she was asleep in the afternoon I punched some more leaves (yellow, red, orange, brown and creamy colours) and I put them together with some real dry leaves next to a drawn tree. With the help of some glue we put the leaves onto the tree's branches. She wasn't interested in the real ones.


Broken leaves had to go on the ground, under the tree

Our nanny arrived and they went on together

Have you noticed that some leaves are falling down ;) ?

"Nice tree. Can I pee on it?"


The second tree is based on the same idea as the dot marker turkey. I drew a tree and on the branches I wrote the first letters of some colours. Dotting fun.


I'm planning to do some more Thanksgiving activities. So come back for the autumn tree of gratitude.
Related Posts Plugin for WordPress, Blogger...