- a plastic bag that can be sealed (I used Ikea bags)
- a paper plate
- green and blue paint
Process:
- put the paint on the paper plate (I put a little more blue than green as there is more water than land)
- place the paper plate (very carefully) into the plastic bag and seal it
- seal the bag
Your child will know what to do right away, I'm sure. If not, tell him or her to press and see how the paint will move everywhere.
E. realised how much more she can spread the paint with the edge of her hand.
The first plate had too much paint on so we pressed it against another paper plate. Although it is called a MESS-FREE painting method, with this change everything became grubby.
I used leftover baby paint so it was easy to clean up.
E. enjoyed it so much we needed to paint one more Earth.
Here is the final result:
Another activity was dot-marker painting of Planet Earth. Click here to download it for free.
I searched for a picture of Earth and I made white dots on land and sea as well.
I wasn't surprised at all that she started to count the dots while she was painting them the right colour.
We ended up writing the numbers and Earth next the Globe. E. traced my numbers and letters. This is her new "hobby". As you can see she stamped some hearts all around Earth, because: - I love you Mommy, and the Earth, too.
As Christmas is getting closer we are doing a lot of Christmassy crafts. They give us the chance to talk about a lot of things in English, like colours, decorations, presents and E. has already learnt plenty of Christmas vocabulary (like candy cane, gingerbread man, angels, advent, wreath, candles, sparklers, baubles, tinsel, gifts etc.)
Here I'd like to present you 2 ideas in connection with decorating a Christmas tree.
Sticker decorations and letter recognition:
I searched for a Christmas tree colouring sheet and I copied it in WORD, then I added the letters and a little table at the bottom. In the table I put the letters and above them you can see a Christmas related word. (We didn't read them I just wanted her to see the words written down.)
I had some Christmas stickers from last year (I'd bought this sheet in KIK for 300 HUF) and I added an angel, a star, a candle, a bauble and a gingerbread man. These stickers are really cool. They easily come off the paper, so I took off the candle and the gingerbread man, just for fun. Later, E. put them back.
One afternoon after her nap this was the scene waiting for her.
She needed to search for a figure and stick the right sticker on the starting letter of the word.
But first she coloured the tree green, the star on the top yellow and the trunk brown. A little more colour talk.
artist at work
Then searching and sticking started:
peeling
sticking
I had to add some more letters as she wanted more baubles and stars.
When she'd finished we displayed it on the door of our living-room.
2. Dot marker decoration
We got a box of DO-A-DOT markers for E.'s birthday in May and ever since we've had so much fun with them. Actually, I saw this dot the letter Christmas tree activity online, though we've done a similar dot marker activity at Halloween with a pumpkin.
This time I drew a Christmas tree with some presents below it. I wrote the beginning letter of the colours, like G for green (a lot of them, though I should have written even more), R for red, Y for yellow, P for purple, B for blue.
I prepared all the dot markers well in advance. I took off the lids so E. didn't need to although it could be a nice fine motor skill practice. There were quite a lot to do with the Christmas tree and I didn't want her to get bored with the opening of the markers.
First, she tried almost all of the colours, then she stuck to one colour and finished dotting all of them on the sheet. As I'd always been telling her to put the lid back on the markers she decided to put it back and pack away the marker when she'd finished with a colour.
packing away
red baubles
She mentioned that she was putting red and purple baubles on the tree. When she was doing the yellow decoration she said they were candles. I asked quite a lot of questions to make her talk while she was working. We even sang the "Oh, Christmas tree, oh, Christmas tree" song:
Then we put the finished Christmas tree next to the other.
I have some more Christmas tree ideas from paper plate with some painting and sticking, however some snowy crafts are on the way too. We'll see what we have time for.
Also, I'd be happy if you let me know in the comments what Christmas tree projects you have with your little one.
I'm not sure if E. understands the concept of being thankful, though one night when we talked to the Angels I wanted to say good night and she said:
- Wait, Mommy!
- Yes?
- I want to say thank you.
- What for?
- For the skeleton costume.
So I might be wrong. She can also say thank you whenever I give her some food or a toy. Sometimes she reminds Daddy to say thank you.
I told her the Thanksgiving story very basically though we focused more on being creative this time.
Colour your turkey - letter recognition
I mentioned to E. that American people celebrate Thanksgiving with turkeys, like we celebrate Martin-day with geese.
So we coloured a turkey. I printed an image of a turkey from the net, but before we started I added some letters to different parts of the turkey. With some of the dot markers I signed orange, yellow, red and purple next to the turkey. She immediately understood how to colour it. We have no brown dot markers so we used a crayon.
identifying the letters
staring with yellow
our colourful turkey
Bubble wrap paint turkey
I found this idea on craftymorning.com . I'm not going into details as you find easy-to-follow instructions on the site.
It looked great, so we tried it. It's a little too complicated with a 2 and a half year old. You need to wait a lot for the paint to dry. E. had no patience. But she enjoyed the painting. I had no dark brown coloured paper so we painted the body too. (The thermo-hat is due to an ear infection)
painting the body
adding the eyes on the stool - where else?
finished with the beak too, though there's no snood
I cut the feathers - she did the sticking
Turkey without legs and snood
Autumn tree variations
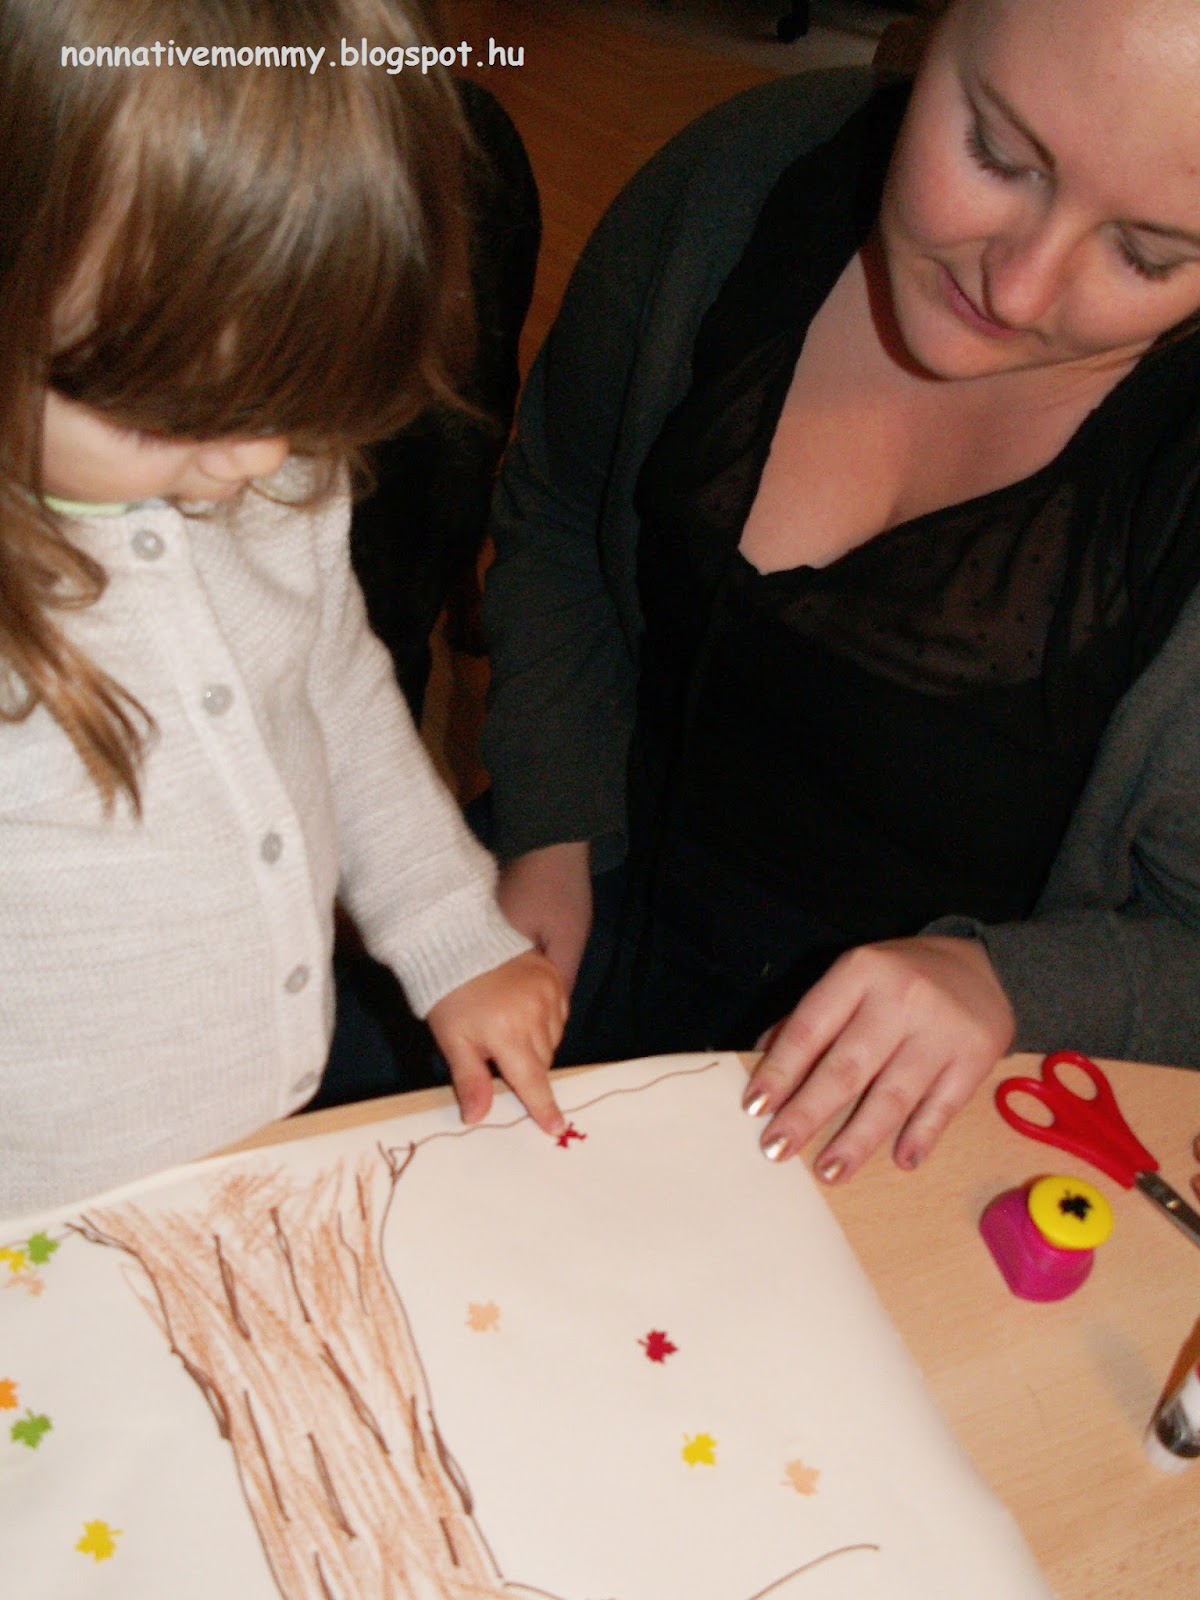
The first tree idea came when E. enjoyed looking at me punching leaf shapes with this.
So while she was asleep in the afternoon I punched some more leaves (yellow, red, orange, brown and creamy colours) and I put them together with some real dry leaves next to a drawn tree. With the help of some glue we put the leaves onto the tree's branches. She wasn't interested in the real ones.
Broken leaves had to go on the ground, under the tree
Our nanny arrived and they went on together
Have you noticed that some leaves are falling down ;) ?
"Nice tree. Can I pee on it?"
The second tree is based on the same idea as the dot marker turkey. I drew a tree and on the branches I wrote the first letters of some colours. Dotting fun.
I'm planning to do some more Thanksgiving activities. So come back for the autumn tree of gratitude.